
My Journey Into 3D Printing: What I Wish I'd Known Before Buying My First Printer
My Journey Into 3D Printing: What I Wish I'd Known Before Buying My First Printer
Two years ago, I thought 3D printing was just expensive science fiction. You know, like those scenes in movies where someone designs something on a computer and then—whoosh—a perfect object materializes out of thin air. It seemed impossibly futuristic and definitely not something regular people like me would ever need or afford.
Then my neighbor Gary started printing replacement parts for his lawnmower.
I'm standing there watching him pull a perfectly functional plastic gear out of this machine that looks like it belongs in someone's garage workshop, not a NASA lab. "Cost me twelve cents in plastic," he says, holding up this little part that would've cost thirty bucks at the hardware store—if they even had it in stock, which they probably wouldn't have.
That was my "aha" moment. This wasn't science fiction anymore. This was practical, everyday problem-solving sitting right there in Gary's basement.
Six months later, I bought my first 3D printer. Now, after countless hours of tinkering, failed prints, small victories, and a few minor disasters, I've learned that 3D printing is simultaneously more amazing and more frustrating than I ever imagined. It's like having a mini-factory in your house, except the factory sometimes throws tantrums and refuses to work for mysterious reasons.
The Reality Check Nobody Talks About
Let me be real with you, and it's something you're not going to hear from most tech reviews and blogs about 3D printing: 3D printing is not plug-and-play. Not even close. If, like me, you think you're going to unbox your machine, hit "print," and watch perfect objects magically appear like you're a small manufacturing facility in your living room, you're going to be disappointed.
My first print was a phone stand. Four hours later, it bore only a vague resemblance to a phone stand, but it was abstract art—if abstract art made of melted plastic and a collection of crushed dreams were a thing. The printer decided "phone stand" meant "a stringy mess that sorta looks like a bird's nest."
With the disintegration of my first print, I spent the next 72 hours watching YouTube tutorials like "Why Your Prints are Failing" and "Bed Leveling for Complete Beginners." I absorbed an enormous vocabulary: bed adhesion/layer height/retraction settings, PETG, PLA, nozzle temperature, bridging, supports, infill percentage. It was like learning a new language, but I was terrified that mispronouncing a word with even a slight difference could lead to four hours of wasted time and a Big Red Blobby Thing.
But here is the thing: Once you get past the initial learning curve, once you start to understand what all of the settings actually do and why it matters, 3D printing quickly gets really addictive—not in a bad way, but in that "I'm just going to make one more adjustment" kind of way, which results in you being up until 2 AM adjusting settings on a print that wouldn't even finish until tomorrow morning.
Again, seeing a complex object emerge layer by layer is incredibly satisfying and I don't think it'll get old. There's something relaxing about it. And when a print comes out just right: perfectly smooth sides; clean overhangs; no stringing; detail crisp and clean—it feels like a real achievement.
The Different Flavors of 3D Printing
When I started researching printers, I assumed they were all basically the same. Plastic goes in, object comes out, how complicated could it be? Turns out, very complicated. There are different printing technologies, different materials, different price points, and different use cases that make choosing the right printer more complex than picking a regular old paper printer.
FDM Printers: The Gateway Drug
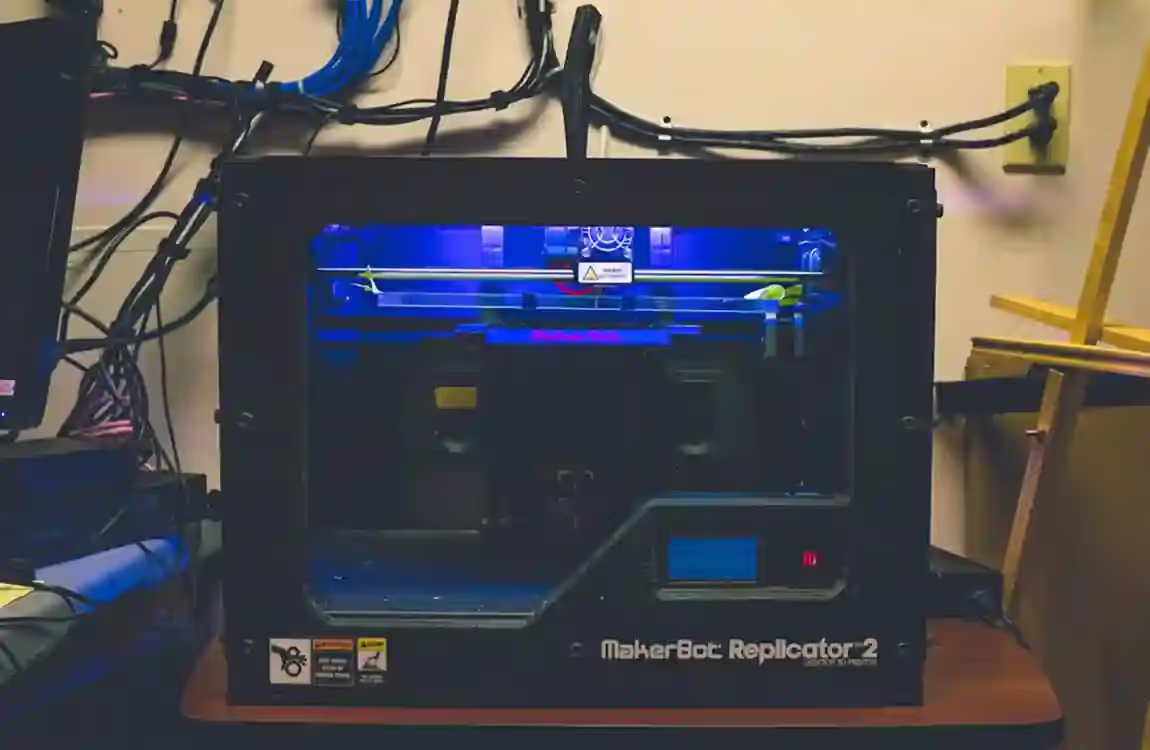
Most people start with FDM (Fused Deposition Modeling) printers, and for good reason. They're relatively affordable, the materials are cheap and safe to handle, and there's a huge community of users sharing tips and tricks. These printers work by melting plastic filament and depositing it layer by layer to build up your object.
My first printer was an FDM machine, and despite the learning curve, I'd recommend starting there for most people. The prints might not have the fine detail of more expensive technologies, but they're perfectly good for functional parts, prototypes, and most hobby projects.
The downside is that FDM prints have visible layer lines—those horizontal ridges that show where each layer was deposited. For some objects, this doesn't matter at all. For others, it can be the difference between a professional-looking result and something that obviously came from a 3D printer.
Resin Printers: When Details Matter
About a year into my 3D printing journey, I got curious about resin printers. These use liquid resin that's cured by UV light to create incredibly detailed prints. The surface finish is smooth, the details are sharp, and the results can look almost injection-molded.
But resin printing is a whole different animal. The resin smells terrible, requires careful handling (gloves, ventilation, proper disposal), and the post-processing is more involved. Every print needs to be washed in alcohol, cured under UV light, and any supports need to be carefully removed.
I bought a small resin printer for detailed miniatures and jewelry prototypes, and the quality difference is night and day. But I still use my FDM printer for larger, functional parts because it's just more practical for everyday use.
The Exotic Stuff
There are also metal 3D printers, ceramic printers, food printers, and other specialized technologies that are mostly used in professional settings. Unless you have very specific needs and a much bigger budget, you'll probably stick with FDM or resin for home use.
Some companies are making hybrid machines that can do both FDM and other processes, but they tend to be expensive and compromise on both functions. It's usually better to pick one technology and get really good at it.

Choosing Your First Printer (AKA Falling Down the Research Rabbit Hole)
When I decided to buy my first 3D printer, I did what any reasonable person does in 2025: I went online to research my options. Three weeks later, I had seventeen browser tabs open, a spreadsheet comparing features and prices, and absolutely no idea which printer to actually buy.
The market is overwhelming. There are printers that cost $200 and printers that cost $20,000. There are kit printers you assemble yourself and fully assembled machines. There are tiny printers that can barely fit a coffee cup and massive machines that could print furniture.
The Budget Reality
Let's talk money first, because that's what ultimately determines your options. You can get a functional 3D printer for under $300, but expect to spend time troubleshooting and upgrading. The sweet spot for most beginners seems to be in the $400-800 range, where you get decent quality and reliability without breaking the bank.
I started with a $450 printer that came mostly assembled and had good reviews for beginners. It wasn't the cheapest option, but it wasn't trying to be everything to everyone either. Looking back, that was probably the right call for my first machine.
Build Volume: Bigger Isn't Always Better
One of the first specs everyone focuses on is build volume—how big an object you can print. My first instinct was to get the biggest printer I could afford, thinking more space would give me more options.
That was partially right, but I learned that larger printers are harder to tune, take longer to heat up, and use more material for the same object (because larger printers often require thicker walls and more infill for stability). Most of what I print fits comfortably in a 200x200x200mm space, which seemed small when I was shopping but turned out to be plenty for 95% of my projects.
Features That Actually Matter
Auto-bed leveling seemed like a luxury when I was shopping, but it turned out to be one of the most important features for a good printing experience. Manual bed leveling is tedious and something you'll need to do regularly, so having the printer handle it automatically saves time and reduces frustration.
A heated bed is basically essential for printing anything other than PLA plastic. Most printers in the $400+ range have this, but some budget models skip it to save costs.
Good documentation and community support matter more than fancy features. I'd rather have a simpler printer with excellent tutorials and active forums than a feature-packed machine with poor documentation.
The Kit vs. Assembled Debate
Some printers come as kits that you assemble yourself, others arrive mostly ready to print. Kits are usually cheaper and teach you how your printer works, which is valuable when something goes wrong. But they require patience and basic technical skills.
I went with a mostly-assembled printer for my first machine because I wanted to start printing as quickly as possible. For my second printer, I bought a kit and enjoyed the assembly process more than I expected. Building it yourself definitely helps you understand how everything works together.
Materials: The Plastic Fantastic World
When I bought my first printer, I thought plastic was plastic. Boy, was I wrong. There are dozens of different materials you can print with, each with their own properties, printing requirements, and use cases. Understanding materials is just as important as understanding your printer.
PLA: The Training Wheels of 3D Printing
PLA (Polylactic Acid) is where almost everyone starts, and for good reason. It's easy to print, doesn't require a heated bed, smells pleasant when printing (some varieties actually smell like candy), and is made from renewable resources like corn starch.
I probably printed exclusively in PLA for my first six months, and it taught me the basics without adding the complexity of more challenging materials. PLA is perfect for decorative objects, prototypes, and anything that won't be exposed to heat or stress.
The downsides are that PLA is brittle, can't handle much heat (it starts softening around 60°C), and isn't great for functional parts that need to flex or bear weight. But for learning the ropes, it's unbeatable.
PETG: The Sweet Spot
Once I got comfortable with PLA, I moved on to PETG (Polyethylene Terephthalate Glycol). It's almost as easy to print as PLA but much stronger and more heat-resistant. PETG is what I use for most functional parts now—tool holders, replacement parts, anything that needs to actually work rather than just look good.
PETG is crystal clear when printed well, which opens up interesting possibilities for decorative objects. It's also food-safe (once properly processed), making it suitable for kitchen tools and containers.
The main downside is that PETG can be stringy if your settings aren't dialed in correctly, and it tends to stick almost too well to the print bed, which can make part removal challenging.
ABS: When You Need It Tough
ABS (Acrylonitrile Butadiene Styrene) is the same plastic used for Lego bricks, which should tell you something about its durability. It's stronger than PLA, more heat-resistant than PETG, and can be smoothed with acetone for a professional finish.
But ABS is also more challenging to print. It tends to warp as it cools, which means you need an enclosed printer or at least a draft-free environment. It also produces fumes that require good ventilation.
I use ABS for parts that need to handle heat or stress—automotive applications, tool handles, anything that might be dropped or knocked around. But it's definitely not a beginner-friendly material.
The Exotic Stuff
Once you get comfortable with the basics, there's a whole world of specialty filaments to explore. Wood-filled PLA that can be stained and sanded like real wood. Metal-filled filaments that are surprisingly heavy and can be polished to a metallic shine. Glow-in-the-dark materials. Flexible filaments that print like rubber.
Carbon fiber reinforced filaments are incredibly strong but require a hardened steel nozzle because the carbon fibers are abrasive. Water-soluble support materials let you print impossible geometries by dissolving away the supports afterward.
I've experimented with most of these at some point, and while they're fun to play with, I keep coming back to PLA, PETG, and occasionally ABS for 90% of my printing.
The Learning Curve: Failures, Frustrations, and Small Victories
Let me tell you about my first month of 3D printing, because it wasn't the smooth introduction to manufacturing I'd imagined.
Week One: The Honeymoon Phase
Everything seemed magical. I downloaded a file for a phone stand, hit print, and four hours later I had a functional object that I'd created from digital data and plastic filament. It wasn't perfect—there were some rough edges and the surface finish wasn't great—but it worked.
I printed a cable organizer for my desk. A replacement knob for a kitchen cabinet. A small vase. Each successful print felt like a minor miracle. I started browsing Thingiverse (a website full of free 3D models) like other people browse Netflix, adding dozens of items to my "to print" list.
Week Two: Reality Sets In
This is when things started going wrong. Prints began failing partway through for reasons I couldn't understand. The nozzle would clog randomly. Prints would start perfectly then gradually shift into strange shapes. Bed adhesion became inconsistent.
I learned about "spaghetti prints"—when something goes wrong and the printer keeps extruding plastic into a tangled mess. I came downstairs one morning to find my printer had spent six hours creating what looked like a plastic birds' nest with my original object buried somewhere in the middle.
The troubleshooting began in earnest. I discovered that 3D printing has more variables than I'd ever imagined: nozzle temperature, bed temperature, print speed, layer height, infill percentage, support settings, cooling fan speed, retraction distance, retraction speed... Each variable affects the others, and small changes can have dramatic effects on print quality.
Week Three: The Turning Point
This is when I stopped treating the printer like a magic box and started understanding it as a machine with specific requirements and limitations. I learned to level the bed properly. I started paying attention to the first layer, which determines whether the rest of the print will succeed.
I discovered that different filament brands print differently, even when they're supposedly the same material. I learned that room temperature and humidity affect print quality. I started keeping a print diary, noting what settings worked for which materials and models.
Most importantly, I learned that failed prints aren't failures—they're learning opportunities. Every stringy mess or warped corner taught me something about how the printing process works.
Week Four: Building Confidence
By the end of the first month, I was starting to predict what would cause problems and how to fix them. I could look at a model file and have a good sense of whether it would print easily or require supports and careful tuning.
I started modifying models in CAD software instead of just printing other people's designs. Simple modifications at first—scaling objects to different sizes, adding mounting holes, combining multiple parts into single prints.
The transformation from "person who owns a 3D printer" to "person who understands 3D printing" probably took about three months of regular use. But that first month was crucial for building the foundation of knowledge that makes everything else possible.
Software: The Digital Side of Physical Objects
A part of the 3D printing space that I totally underestimated was the software side of things. You don't just send files to a 3D printer in the same way that you do a paper printer. There is an entire digital workflow where 3D models are turned into instructions the printer can follow.
Slicing Software - Where all of the Magic Happens
The most important piece of software is called a "slicer." Slicer software takes a 3D model (usually an STL file) and converts it into G-code, which is the set of instructions a 3D printer interprets in order to know where to go, at what speed, and when to extrude melted plastic.
While most printers have a recommendation for slicer software, there are independent options available, which sometimes are superior. I started out using the manufacturer's recommended software but eventually switched to PrusaSlicer, an independent product with great built-in automatic settings and support material visualizations.
The slicer is where you have control of all of those variables I have mentioned before; the layer height, infill pattern / density, support generation, speed... you name it, it is all configured in the slicer software. Learning how to manipulate those settings is just as important as learning about your printer hardware.
CAD Software - Making Your Own Creations
Although printing other people's designs is fun and valuable, the enormous potential of 3D printing is tapping into your own creativity. To make your own objects, it is necessary to use CAD (Computer Aided Design) software to make 3D {or more complex] model.
I started with Tinkercad, a free web-based 3D program that is perfect for beginners. Tinkercad is a program using digital Lego blocks - you can combine simple forms to make more complex objects. In just a few weeks, I was designing organizers, replacement parts and tools.
Once I had developed some skills, I moved onto Fusion 360. Fusion 360 software was a great step for me; much more powerful and complex than Tinkercad. The learning curve was steep, but being able to develop accurately dimensioned and professional designs was worth it.
There are so many other CAD options, from free versions such as FreeCAD and Blender to professional packages such as SolidWorks and Rhino. The most important goal to which I can encourage you would be to find something that fits with your skills and how you plan to play with your 3D process.
The overload of files and File Storage and Sharing
Something that nobody ever tells you about 3D printing is that in a very short period of time you will accumulate hundreds of STL files, slicer profiles, notes, and CAD file. Once the accumulation begins to take place, you need to find a way to monitor access, particularly if you want to reprint something you made 6 months ago.
My cheat for organisation was to name files descriptively, annotate critical print settings that I had validated, and created a manageable folder structure for myself. Easy! But after becoming excited by new prints, organization is the last thing you find yourself doing.
The 3D printing community continues to be incredibly generous to the open source designer and there are databases like Thingiverse, MyMiniFactory, and Printables to explore tens of thousands of free models. I have added some of my own designs, and have enjoyed the communication from others who have downloaded and printed!
The Hidden Costs Nobody Mentions
When I budgeted for my first 3D printer, I focused on the printer price and maybe some filament. I didn't anticipate all the additional expenses that would sneak up on me over the following months.
Tools and Accessories
You'll need tools for removing prints, cleaning the bed, and maintaining the printer. Basic hand tools, scrapers, brushes, allen keys, spare nozzles, bed springs... it adds up quickly.
I probably spent another $100 in the first few months just on basic tools and accessories. Not a huge amount, but definitely more than I'd planned for.
Upgrades and Modifications
This is where things can get expensive. The 3D printing community loves to modify and upgrade their machines. Better cooling fans, silent stepper drivers, upgraded hot ends, automatic bed leveling sensors, LED lighting strips...
Some upgrades genuinely improve print quality or reduce maintenance. Others are just fun projects that make you feel like you're optimizing your machine. I've probably spent as much on upgrades as I did on my original printer, but spread out over two years.
Material Costs
Filament is relatively cheap—maybe $20-30 per kilogram for good quality material. But you'll go through more than you expect, especially when you're learning and producing failed prints.
I keep several colors and types of filament on hand, which means tying up money in inventory. It's not expensive compared to other hobbies, but it's more than just buying ink cartridges for a paper printer.
Time Investment
This isn't a monetary cost, but it's worth considering. 3D printing is not a fast process. Simple objects might print in an hour or two, complex items can take eight hours or more. Large prints might run overnight or even for several days.
You also need to factor in design time, slicing time, post-processing time, and the occasional troubleshooting session when something goes wrong. It's a hobby that rewards patience and planning.
Real-World Applications That Actually Matter
After two years of 3D printing, I've settled into patterns of use that provide genuine value rather than just novelty. Here are the applications that have made owning a 3D printer worthwhile for me.
Replacement Parts
This is probably the most practically valuable use case. When something breaks and you need a plastic part, you have several options: buy a whole new product, search for replacement parts (which may not be available), or design and print your own solution.
I've printed replacement parts for appliances, furniture, tools, and toys. A knob for an old amplifier that would have cost $25 to replace. A bracket for a computer monitor that was no longer manufactured. Custom spacers for a furniture assembly where the original hardware was missing.
The satisfaction of fixing something that would otherwise be thrown away is enormous. It's also environmentally friendly and often much faster than ordering parts online.
Custom Organization Solutions
This might sound boring, but custom organizers and storage solutions are incredibly useful. Being able to design a tool holder that fits your exact tools, or a cable organizer that fits your specific desk setup, is genuinely valuable.
I've printed dozens of organizers for tools, electronics, craft supplies, and household items. Each one fits perfectly because it was designed for the specific space and purpose. You can't buy this level of customization anywhere.
Prototyping and Testing Ideas
Before committing to expensive materials or complex fabrication, I can print prototypes to test fit, function, and design. This has saved me from several expensive mistakes on other projects.
I designed a mounting system for some workshop equipment and printed several iterations to test the fit and clearances before machining the final version in aluminum. The plastic prototypes cost a few dollars in material and let me work out all the design issues before committing to expensive metal.
Creative and Educational Projects
3D printing opens up possibilities for creative projects that would be difficult or impossible with traditional crafting methods. Complex geometries, moving parts, custom textures, and precisely interlocking components are all straightforward with a 3D printer.
I've printed educational models for friends who are teachers, created custom game pieces, and designed decorative objects that would be challenging to make any other way.
Small Business Applications
Several people I know have turned 3D printing into small businesses, creating custom products or replacement parts for customers. The ability to produce small quantities of customized items economically is unique to additive manufacturing.
One friend started printing custom cookie cutters for local bakeries. Another creates replacement parts for vintage electronics. The barriers to entry for small-scale manufacturing have never been lower.
The Community Aspect You Don't Expect
One of the most unexpected results of my 3D printer adventure has been the community. There's a passionate group of people willing to share their experiences, help you troubleshoot, and celebrate your success.
Online Communities
There are forums, reddit communities, discord groups, and sites dedicated to helping people that are willing to share their projects and help other makers. When I was struggling to get my first printer working, I received in-depth assistance from strangers who volunteered their time and identified my production issues to help me troubleshoot costly errors.
Most of the people participating are generally in the open source and sharing culture. People share their designs, share their thought process through documentation, and share their collective knowledge not just for personal success, but to make others better.
Local Makerspaces and Groups
Even small towns have makerspaces or 3D printing groups where you can access professional-level machines, get hands-on assistance, and meet like-minded people. They have state of the art printers, tools and expertise that would cost the average individual an embarrassing amount of money.
In my second year of printing, I got a membership in a local makerspace. I learned more in a few months of hands-on workshops than I did in my first year of experimentation alone.
Educational Opportunities
These days, you can take a 3D printing class at local libraries, community colleges, and some high schools. Structured educational offerings can really speed up your learning curve and potentially expose you to techniques and applications you may not discover on your own.
3D printing is definitely on the radar of the educational sector as a means for teaching design processes, engineering principles, and manufacturing concepts in a hands-on, project-driven way.
Looking Forward: Where 3D Printing Is Headed
After watching the technology evolve over the past few years, I'm excited about where 3D printing is headed for home users.
Easier, More Reliable Machines
Printers are getting easier to use and more reliable each year. Features that were expensive options a few years ago—auto-bed leveling, filament sensors, resume-after-power-loss—are becoming standard on mid-range machines.
The software is also improving rapidly. Automatic support generation, adaptive layer heights, and intelligent print speed optimization are making high-quality results more accessible to beginners.
New Materials and Applications
The range of printable materials continues to expand. Conductive filaments for printed electronics, medical-grade materials for prosthetics, biodegradable materials for temporary applications—the possibilities keep growing.
Multi-material printing is becoming more accessible, allowing single prints to combine different properties and colors without manual intervention.
Integration with Other Technologies
3D printing is increasingly being combined with other digital fabrication methods. Printers that can pause mid-print to allow insertion of electronics or other components. Systems that combine 3D printing with CNC machining or laser cutting for hybrid manufacturing.
Larger Scale and Faster Printing
Print speeds are improving dramatically with new printer designs and better slicing algorithms. What took eight hours to print two years ago might take two hours today.
Build volumes are also increasing while prices remain reasonable. Printing furniture-scale objects at home is becoming practical for hobbyists, not just industrial users.
Should You Take the Plunge?
After two years of trying it out (and a fair amount of frustration, learning curve, failed prints, a significant number of successes) would I recommend 3D printing to other people? For the vast majority of people, Yes—perhaps with a realistic expectation. A 3D printer is not a replacement for buying things, it is not quicker, less expensive or easier than ordering things online in all but the narrowest of use cases. It definitely provides you some level of customization; it provides on demand availability—and arguably it provides you with something to build or make rather than consume.
If the idea of learning a skill appeals to you, you are not worried about fidgeting with a machine, resolving any technical problems that come up and you can find value in practical applications of custom plastic injection-molded parts or other uses, you could have a lot of fun. 3D printing has opened a door to design, engineering and manufacturing that until recently was only available to professional engineers.
If you want 'plug and play' convenience and have no patience to tinker with anything—good luck—3D printing is likely going to be frustrating (the technology simply isn't there yet for appliance-like reliability).
That said, I would probably go with a mid-range price FDM printer to buy from a reputable maker, allocate some funds for tools and materials, good news is it's likely you will spend more time learning than producing. If you can take a class or workshop or get involved with an online community, that's great— please do! Think of it as a learning hobby rather than a manufacturing tool, it is immeasurably, more valuable when you do!
When you finally design something custom, successfully print it and actually solve a real world problem with a 3D printed part (there is tremendous value in the learning curve) stretching over more than two years, I am still learning new applications or techniques. This value of never ending discovery and capability development, makes the experience thrilling—not simply as an item that you can 3D print, but within the quality of your use as a 3D printed object that you have a sense of ownership over.
Whether it is repairing a broken household object, prototyping an idea, making art, or simply enjoying the collaborative process of transforming a digital object into a physical object, I think 3D printing takes the combination of creativity, learning technical skills, and an applied problem solving to almost another level that is seldom achieved in a single hobby.
That said—don't expect it to be easy. Some of life's best things seldom are.